Using the example of logins and logouts, which are created directly in the wind farm by scanning a QR code, we would like to show how the individual functions interact.
Prerequisites
- There must be a rotorsoft information event “Login” and “Logout”.
- You must know the email address of your rotorsoft system (usually alarm@SUBDOMAIN.rotorsoft.net).
- rotorsoft must be configured to receive emails (you can test this by sending a test email to your rotorsoft system address and checking whether it appears in your inbox).
- For attachment to wind turbines, either a magnetic picture frame* or outdoor adhesive film* is required.
Inbox
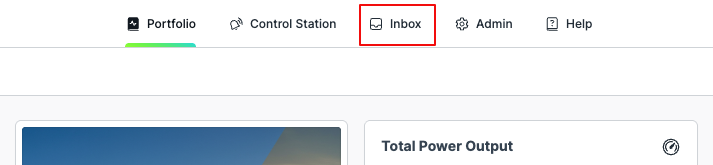
The inbox can be found in the rotorsoft menu.

Here you will find an overview of all messages sent to your rotorsoft system address, if any have already been received.
In our example, we assume that your inbox is empty.
Assignment Filter
In order for emails or text messages to be assigned to a plant, rotorsoft must be informed by a so-called “assignment filter” which uses certain characteristics to identify which plant the message belongs to.
To stick with the example of registrations and deregistrations, the serial number in the format of the NIS label is of course suitable for establishing a clear reference.
To do this, we create an assignment filter by clicking on “Filter” in the lower area of the inbox and then creating a new assignment filter in the right-hand window area (if there is not already one for the plant).
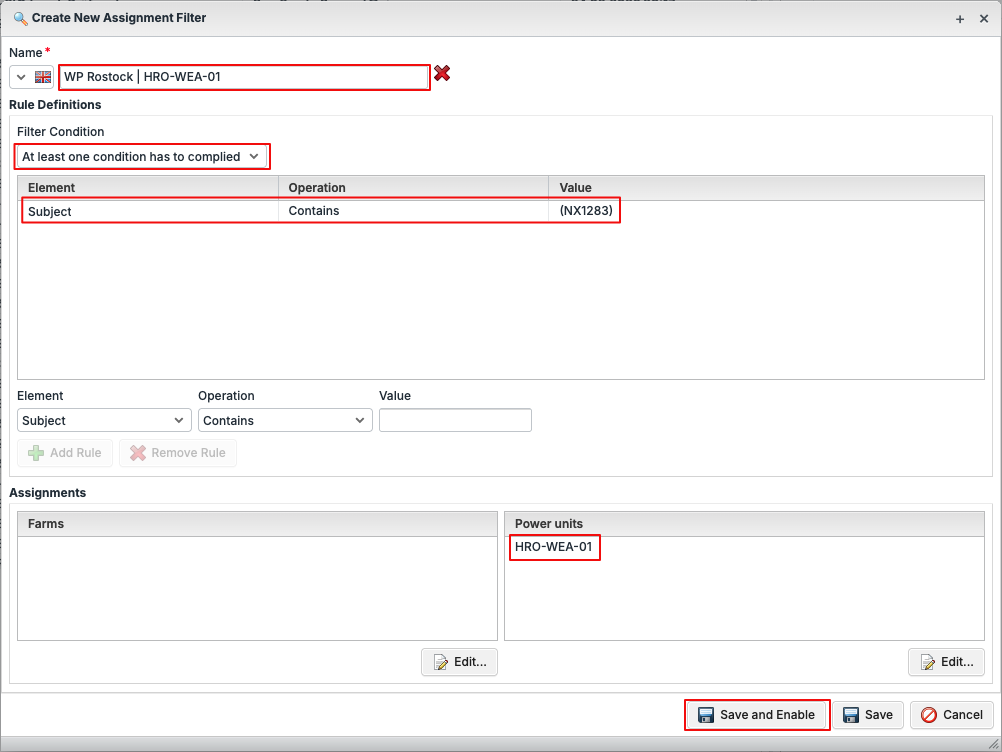
When creating the assignment filter, a unique name and the NIS label should be used to avoid overlaps with other plants.
To prevent overlaps in serial numbers, we recommend placing a character before and after the NIS label, e.g. ( and ). This prevents DP123 and DP1234, for example, from overlapping and creating incorrect assignments.
For our plant with the NIS label, we use (NX1283) as the search text.
Action Filter
After informing rotorsoft of the characteristic that can be used to identify the affected plant, the second step is to create an action filter to enter our login and logout as a logbook entry in rotorsoft.
To do this, we create an action filter that contains the unique characteristics for a login and logout, e.g. the subject “ROTORSOFT-TURBINE-CHECKIN” for a login and “ROTORSOFT-TURBINE-CHECKOUT” for a logout.
As an action, we use “Create logbook entry”, activate the transfer of the subject and content as a comment and finally delete the message from the inbox.
If you want to use additional actions, such as forwarding the message to email addresses or address book groups, you can of course add these actions as well.
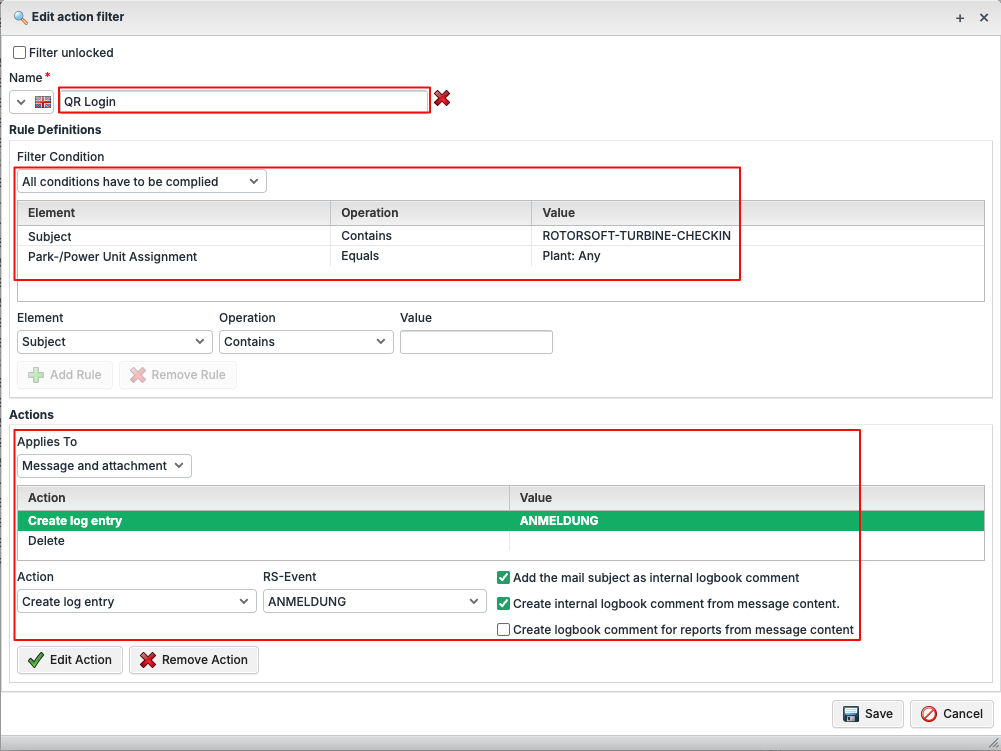
In addition to specifying the subject, it is also important to specify the park/plant assignment so that rotorsoft only processes messages that could be assigned to a plant after a positive trigger of an assignment filter.
We then use the same procedure to create an action filter for a “QR logout”.
First Test
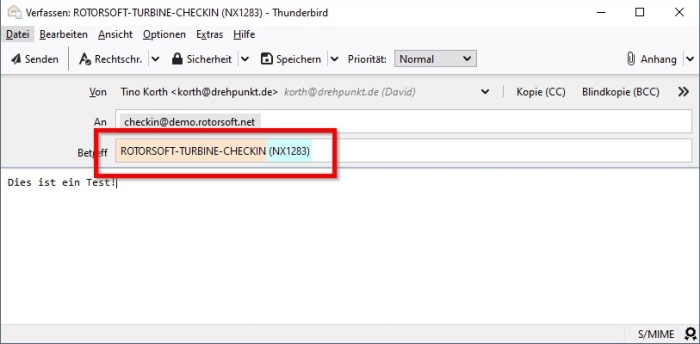
Now that we have defined an assignment filter for the first plant and an action filter for login and logout, we can test the whole thing.
To do this, we send an email from our normal email client to our rotorsoft system, taking into account the texts we have defined for the login and logout:
Generate QR Codes
Currently, it is not yet possible to automatically generate corresponding QR codes in rotorsoft – however, this feature is planned for the near future.
Therefore, to generate a QR code, you must use a free QR code generator. We have had good experiences with the following generator:
https://qrd.by/designer-qr-code-with-embeded-logo#email
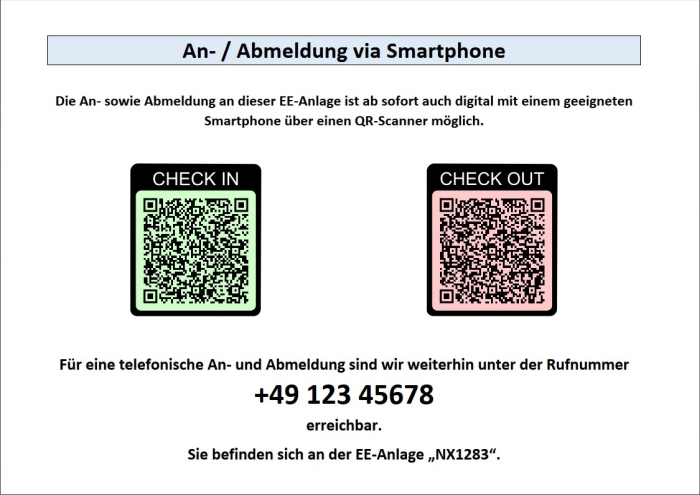
In order to distinguish between the login and logout codes graphically, we recommend using different colours and text, e.g. as in this example:
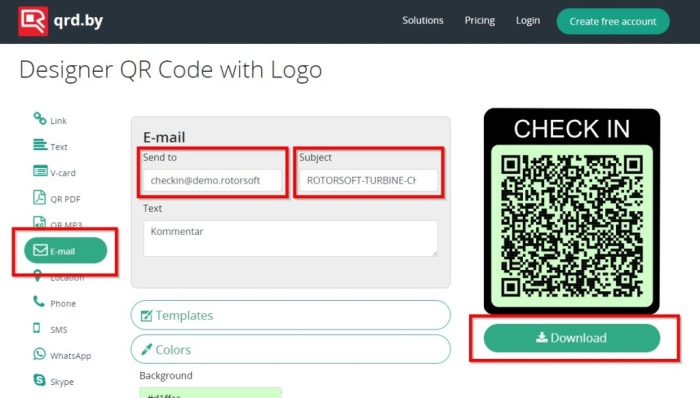
In the “Send to” field, enter your rotorsoft system address, and in “Subject”, enter the text for the action filter and the assignment filter, e.g. “ROTORSOFT-TURBINE-CHECKIN (NX1283)”.
To write the text “CHECK IN” over the QR code, use the “Frame and fonts” option. The background colour can be set in the “Colors” section.
For a good printout, we recommend downloading a vector graphic.
From the generated graphics, you can now create an individual login/logfout document for each wind turbine, e.g.
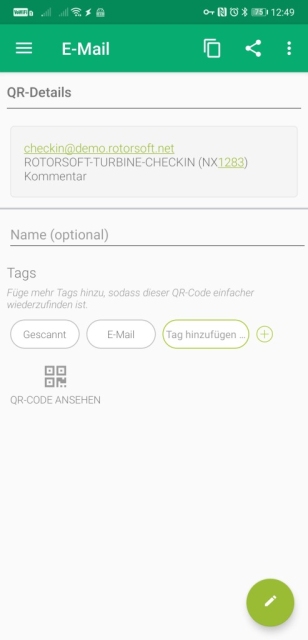
Final Test
After printing out the QR codes, we scan them using our smartphones and check whether we receive a log entry when scanning the code and sending an email.
* Affiliate links